
Ciao ragazze!
Qualche settimana fà in challenge blog Create Lern Love è stato pubblicato il mio passo a passo "Card Con Ucellino". Siccome non potevo lasciarvi senza questo passo a passo ho deciso di tradurre questo Passo a passo per vuoi in Italiano.
Qualche settimana fà in challenge blog Create Lern Love è stato pubblicato il mio passo a passo "Card Con Ucellino". Siccome non potevo lasciarvi senza questo passo a passo ho deciso di tradurre questo Passo a passo per vuoi in Italiano.
Hello girls!
A few weeks ago in challenge blog Create Lern Love was published my step by step "Card With Ucellino". Since I could not leave you without this step by step I decided to translate this Step by step for you in English.

Lista di materiali :
-Un pezzo di Carta per Scrapbooking 15 х 15 см di Prima Collection
- Ritagli di carta per scrapbooking Prima Collectio
-Fiori
- Mezza perle
- Cornicetta in metallo
- Cipboard
- Stampi
-Ink pad permanente
- Gesso bianco
- Inchiostro IZINK
- Penelli
- Ucellino in Gesso
1. Ho tagliato la base per la card da un foglio di carta da acquerello formato A4,
misure della mia card in modo piegato è 15,5 x 10,50 cm. Poi ho taglito foglio di artoncino Craft di 0,5 mm piu piccolo di quello per la base (10 x 15.5 cm). E sucessivamente ho tagliato il foglio di carta per scrapbooking per creare lo sfondo della mia card (14 x 9 cm). I pezzettini rimasti dalle carte non le buttiamo ci possono tornare utili.
I cut the base for the card from a sheet of watercolor paper A4,
measures of my card so folded is 15.5 x 10.50 cm. Then I taglito sheet artoncino Craft 0.5 mm more smaller than that for the base (10 x 15.5 cm). And sucessivamente I cut the sheet of paper for scrapbooking to create the background of my card (14 x 9 cm). The pieces were from the cards do not throw us can come in handy.

2. Usiamo stamp per creare degli effetti particolari sullo sfono della nostra card.
We use the stamp to create interesting effects on sfono of our card.

3. Ho usato le forbici per creare l'effetto per i bordi strappati, invecchiati.
I used scissors to create the effect for the torn edges, aged.
I used scissors to create the effect for the torn edges, aged.

4. Comiciamo assemblare . Prima i stratti di carte, poi turri abbellimenti.
We begin to assemble. First-layer card, then turri embellishments.

5. Incollare cornice, fiori e cipboard
Paste frame, flowers and cipboard

6. Io volevo aggiungere un poco di dinamica e leggerrezza alla mia composizione ed ho deciso di aggiungere i pezzetti di organza e di spago bianco.
I wanted to add some dynamic and leggerrezza to my membership and I decided to add the pieces of organza and white string.

7. Uso il Gesso bianco per dare un pò di luce
Use the white gesso to give a little light to embelishments

8. In questo passaggio io sto usando inchiostri IZINK per aggiungere un poco di colore allo sfondo e creare un po di ombreggiature. Ho ridipinto anche la rosellina centrale blue cosi si abbina meglio ai colori della palette della card.
In this step I'm using inks IZINK to add a little color to the background and create a bit of shading. I also repainted the central rosette blue so it goes better with the colors of the palette of the card.

9. Adesso la nostra card è pronta, possiamo solo aggiungere qualche impronta di un stampo con le scritte per dare un area di Romanticizmo alla card.
Now our card is ready, we can just add some imprint of a mold with the words to give an area of Romantic to the card.

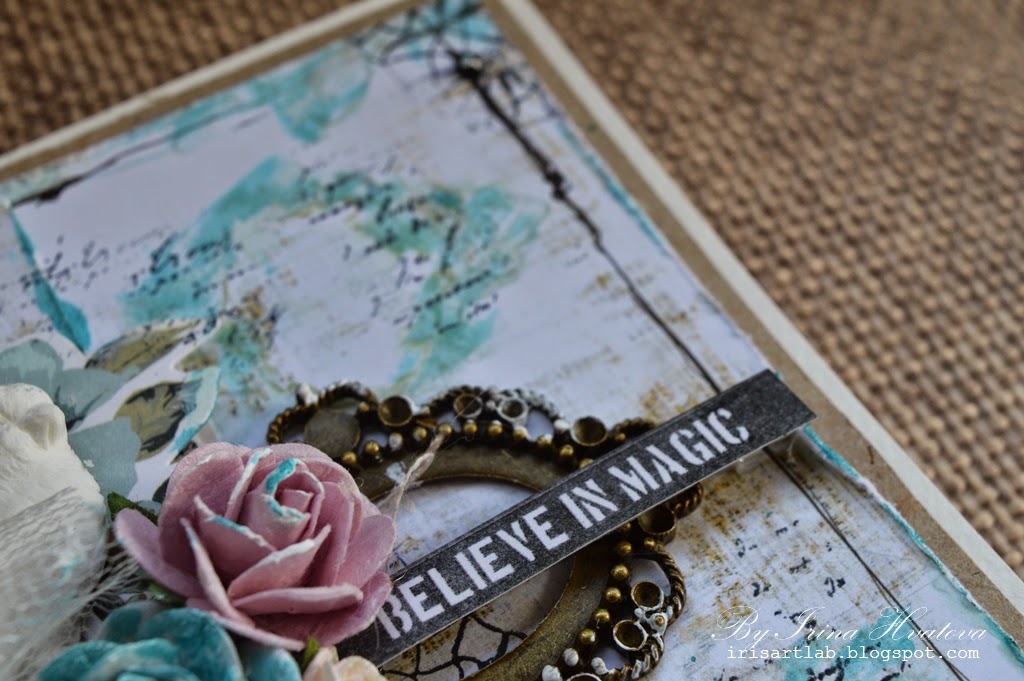
Altre foto della card
More close aps


Grazie per la visitae vostri commenti !
Vi invito anche a partecipare all'estrazione di premio che si estrae ogni mese qui nel mio blog , e questa volta si tratta di un mega premio primaverile
"Candy "Shabby Style" che sarà estratto il giorno 15 Aprile !!!
Le regole, per saper come poter partetipare troverette qui.

Mi manca solo di augurarvi buona fortuna!
Thank you for vidit and your comments!
Nessun commento:
Posta un commento